We actually like to "Renno"
(my Aussie slang for renovate)
We were particularly lucky that throughout most of this my generous In-laws hosted us until it was livable.
I pieced this pic together to show how the floor plan was when we bought it.This family room was next to the kitchen and I wanted to turn it into a dining area, that made more sense to me. I wanted to bring the old wall forward 8 ft inline with the kitchen wall. The pic below shows how wide the walkway was. I really didn't like how you could see all the way to the back door from the front. It felt like a bowling lane!
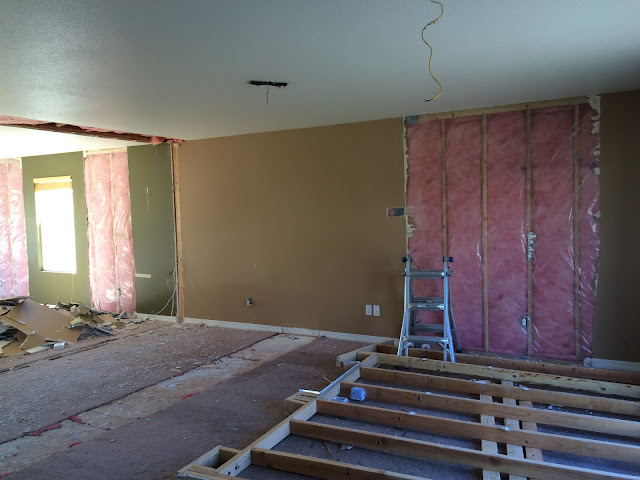
Luckily that wall was not load baring, so ,we knocked it down!
Of course that means moving electrical and furnace returns.
All clear! (I was half tempted to keep it entirely open) We had to patch the sub floor because there were furnace holes that we re-routed. It doesn't look like we moved the wall far does it? (below)
But what a difference it is going to make to the overall flow.
Notice how dark it is in mid day? Dark green paint doesn't help.
Neither did the lack of natural lighting or light fixtures. Check out that lonely window on that 30ft wall!!!
We decided while we were torn apart that we would add windows too.
We added one on either side of the existing living room window.
And made room for one in the new dining room. The next step was removing the nasty carpet. I'm not a huge fan of carpet. It has its place. I do like it in a bedroom. My preference is a solid floor, wood, tile, concrete, anything that I can see the dirt on I prefer. Sound weird? Maybe, but carpet tends to hide and store dirt and germs that i'd just as soon get rid of and not breathe in.
The carpet removal was a big job, and what was underneath was just as nasty. Because we were laying a solid floor each staple had to come out too.
It was time consuming and unpleasant but we got there.
Goodbye carpet!! We then re-built the wall and put it in place.
Here, not only do you see my little cutie, but also the new windows!!
Best Decision ever!
And the new wall now lines up with the kitchen.
Time to re-wire electrical, add new furnace returns and patch the hole in the ceiling. In addition to windows which made a huge impact, we added LED
can lighting. We spaced them about every 7 ft and added 8 to the living area and 10 to the kitchen/dining. I have loved them. They don't have to warm up like the old cans they come on big and bright at the flick of a switch. Another thing I wanted to change was the wall texture. This is known as Orange Peel texture.(below) Once again its a personal preference, I wanted to get an overall smoother look (wholly smooth) and after agonizing over the cost of re-texturing walls we went for it. This project we did not do ourselves. We had a great crew come in, they were speedy and did a great job.
It only took about 6 days,including drying time.
I did not do my closets, laundry or pantry.
 |
| Tons of Mud and Dust. But no more Orange peel! |
 |
| Love those windows! |


No comments:
Post a Comment